Docker Image Optimization: Build Smaller, Faster and Safer Images
Practical Dockerfile best practices for beginners: smaller base images, .dockerignore, multi-stage builds, cache mounts and non-root users, with measured results and a Docker commands cheat sheet.
Introduction
Docker image optimization means building images that contain only what your app needs to run. Nothing more.
It matters because every extra megabyte has a cost. Big images take longer to push, pull and deploy. They use more disk and bandwidth. They also ship more software, and more software means more security vulnerabilities to patch.
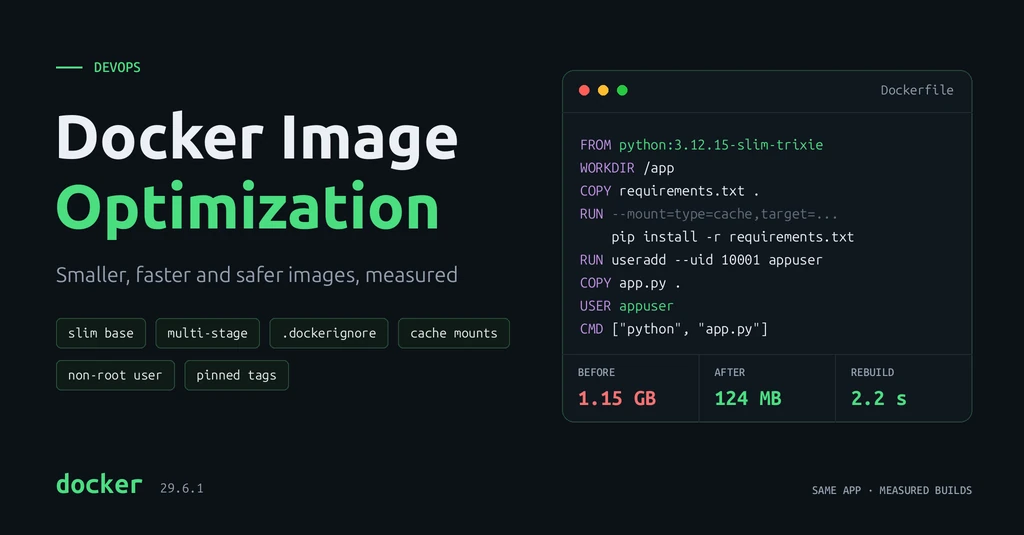
In this guide, we take a simple Python app from 1.15 GB to 124 MB, and cut rebuild time from 31.5 seconds to 2.2 seconds. Every number below was measured, not estimated.
Key Optimization Techniques
1. Use Minimal Base Images
The base image is the starting point in your FROM line. The default python:3.12 image includes compilers and many system tools. The slim variant keeps only what Python needs to run.
| Base image | Size on my machine |
|---|---|
python:3.12 | 1.11 GB |
python:3.12-slim | 119 MB |
Start with slim. Alpine images are smaller still, but they use a different C library (musl), so some Python packages need compiling. That can make builds slower and less predictable.
2. Use Multi-Stage Builds
A multi-stage build uses one image to build and a second, smaller image to run. You copy only the finished result into the final image. Compilers and build tools stay behind.
FROM python:3.12.15-trixie AS builder
RUN python -m venv /opt/venv
ENV PATH="/opt/venv/bin:$PATH"
COPY requirements.txt .
RUN pip install -r requirements.txt

FROM python:3.12.15-slim-trixie
COPY --from=builder /opt/venv /opt/venv
ENV PATH="/opt/venv/bin:$PATH"
# ...then copy app.py, add the non-root user and CMD, as in the full example below
An honest note: for my small Flask app, this produced a 135 MB image, slightly larger than the single-stage slim build (124 MB). The copied virtual environment includes its own pip. Multi-stage builds pay off when packages need compilers or system libraries to install, or for compiled languages like Go.
3. Optimize Dockerfile Layers
Each RUN, COPY and ADD instruction creates a layer, which is like a saved snapshot. Docker reuses unchanged layers from cache.
Two rules help most:
- Order from least to most often changed. Copy
requirements.txtand install dependencies before copying your code. Then a code change does not reinstall every package. - Combine commands that create and clean up files in the same
RUN, so temporary files never reach a layer.
4. Use .dockerignore
COPY . . sends your whole folder to Docker, including things the app never uses. A .dockerignore file works like .gitignore:
.git
.venv
__pycache__/
*.pyc
.pytest_cache/
.env
Dockerfile*
.dockerignore
Without it, my basic image contained a 36 MB local .venv and the .git folder. Excluding .env also keeps secrets out of the image.
5. Use BuildKit Cache Mounts
BuildKit is Docker's build engine, enabled by default since Docker Engine 23.0. A cache mount keeps pip's download cache between builds, but outside the image:
RUN --mount=type=cache,target=/root/.cache/pip \
    pip install -r requirements.txt
Rebuilds after a dependency change download less, and the cache adds nothing to the image size.
6. Remove Unnecessary Dependencies
Install only what production needs. Keep test and lint tools such as pytest in a separate requirements-dev.txt, and install that only in development or CI.
7. Run as a Non-Root User
Containers run as root by default. If an attacker breaks into your app, root makes the damage worse. Create a normal user and switch to it:
RUN useradd --create-home --uid 10001 appuser
USER appuser
8. Pin Base Image Versions
python:3.12 silently changes when a new patch release comes out. Pin the full version and OS release, for example python:3.12.15-slim-trixie, so builds are reproducible. For strict reproducibility, also pin the image digest (@sha256:...), and update it on purpose.
Practical Example: Optimizing a Python App
Our app is a small Flask service (app.py) with flask==3.1.2 in requirements.txt.
Before: a basic Dockerfile
FROM python:3.12

WORKDIR /app

COPY . .

RUN pip install -r requirements.txt

CMD ["python", "app.py"]
It works, but it uses a 1.11 GB base image, copies everything in the folder, reinstalls packages on every code change and runs as root.
After: an optimized Dockerfile
# syntax=docker/dockerfile:1
FROM python:3.12.15-slim-trixie

ENV PYTHONDONTWRITEBYTECODE=1 \
    PYTHONUNBUFFERED=1

WORKDIR /app

# Install dependencies first so this layer is reused when only code changes
COPY requirements.txt .
RUN --mount=type=cache,target=/root/.cache/pip \
    pip install -r requirements.txt

# Create an unprivileged user to run the app
RUN useradd --create-home --uid 10001 appuser

COPY app.py .

USER appuser

EXPOSE 8000
CMD ["python", "app.py"]
What changed:
- Pinned slim base image: smaller and reproducible.
- **
PYTHONDONTWRITEBYTECODE** stops Python writing.pycfiles into the image. **PYTHONUNBUFFERED** shows logs immediately. - Dependencies before code: code changes reuse the cached install layer.
- Cache mount: faster dependency installs, with no pip cache left in the image.
- **
COPY app.py .** copies only the code, together with the.dockerignoreabove. - Non-root user: the container runs as
appuser.
For a real deployment, run the app with a production server such as Gunicorn instead of Flask's built-in server.
Measure the Results
Build each version with its own tag, then compare:
docker build -f Dockerfile.basic -t my-app:before .
docker build -f Dockerfile -t my-app:after .

docker images my-app
docker image inspect my-app:after --format '{{.Size}}'
docker history my-app:after
docker images shows a readable size. docker image inspect gives the exact size in bytes. docker history shows how much each layer adds, which points you at the biggest step.
My results (Docker 29.6.1, Linux, same app and dependencies):
| Version | Image size | Rebuild after a code change |
|---|---|---|
| Basic Dockerfile | 1.15 GB | 31.5 s |
Basic + .dockerignore | 1.12 GB | n/a |
| Optimized (above) | 124 MB | 2.2 s |
| Multi-stage | 135 MB | n/a |
To compare fairly:
- Build from the same code and dependencies.
- Compare the same metric. Local size is uncompressed; registry size is compressed and smaller.
- Change one thing at a time to see what each step contributes.
- Measure rebuild time after a code-only change, since that is what you do all day.
Common Mistakes
- Large base images by default. Most apps do not need a full OS toolchain at runtime.
- Copying the entire project. Without
.dockerignore,.git,.venvand even.envend up in the image. - Development dependencies in production. Test tools add size and attack surface.
- Ignoring build cache. Copying code before installing dependencies makes every build reinstall everything.
- Deleting files in a later layer. A file added in one
RUNstays in that layer even if a laterRUNdeletes it. In my test, creating a 100 MB file and deleting it in a separate step left the image at 219 MB. Doing both in oneRUNkept it at 119 MB. Avoid adding the file in the first place.
Docker Commands Cheat Sheet
The commands you need most while building and optimizing images. Replace my-app with your image name.
Build images
| Command | What it does |
|---|---|
docker build -t my-app:1.0 . | Build an image from the Dockerfile in this folder and tag it |
docker build -f Dockerfile.prod -t my-app . | Build from a different Dockerfile |
docker build --no-cache -t my-app . | Rebuild every layer, ignoring the cache |
docker build --target builder -t my-app:build . | Build only up to one stage of a multi-stage build |
docker build --progress=plain . | Show full build output, useful for debugging |
docker build --platform linux/amd64 -t my-app . | Build for a specific CPU architecture |
Inspect images
| Command | What it does |
|---|---|
docker images | List images and their sizes |
docker image ls --filter reference='my-app*' | List only matching images |
docker history my-app | Show each layer and how much it adds |
docker image inspect my-app --format '{{.Size}}' | Exact image size in bytes |
docker system df | Disk used by images, containers, volumes and build cache |
docker scout quickview my-app | Summary of known vulnerabilities, if Docker Scout is installed |
Run and manage containers
| Command | What it does |
|---|---|
docker run --rm -p 8000:8000 my-app | Run a container, map port 8000, remove it on exit |
docker run -d --name web -p 8000:8000 my-app | Run in the background with a name |
docker run --env-file .env my-app | Pass environment variables from a file at runtime |
docker run -it --rm my-app sh | Open a shell in a new container |
docker ps / docker ps -a | List running / all containers |
docker logs -f --tail 100 web | Follow the last 100 log lines |
docker exec -it web sh | Open a shell in a running container |
docker exec web whoami | Check which user the app runs as |
docker stats --no-stream | One snapshot of CPU and memory use |
docker stop web / docker rm web | Stop / remove a container |
Share images
| Command | What it does |
|---|---|
docker login | Sign in to a registry |
docker tag my-app:1.0 user/my-app:1.0 | Add a registry name to an image |
docker push user/my-app:1.0 | Upload an image |
docker pull python:3.12.15-slim-trixie | Download an image |
docker buildx imagetools inspect python:3.12.15-slim-trixie | Show an image's digest for pinning, without pulling it |
Clean up
| Command | What it does |
|---|---|
docker rmi my-app:old | Remove an image |
docker image prune | Remove dangling (untagged) images |
docker image prune -a | Remove every image not used by a container |
docker builder prune | Clear the build cache, including cache mounts |
docker system prune | Remove stopped containers, unused networks, dangling images and build cache |
Prune commands ask for confirmation and cannot be undone. Add --volumes to docker system prune only if you are sure: it also deletes unused anonymous volumes, which can hold data.
Docker Image Optimization Checklist
- Use a
slimbase image, pinned to a full version - Add a
.dockerignore(.git,.venv, caches,.env) - Copy dependency files and install them before copying code
- Use a BuildKit cache mount for package downloads
- Install production dependencies only
- Use a multi-stage build when installs need compilers
- Run as a non-root user
- Check results with
docker imagesanddocker history - Confirm the user with
docker exec <container> whoami
Conclusion
Docker image optimization is a handful of small habits with large results. A smaller base image and a .dockerignore cut image size. Smart layer order and cache mounts make builds faster. Smaller images deploy faster, and a non-root user with fewer packages reduces security risk. Measure before and after, and let the numbers guide each change.
Related posts:
- FastAPI for Beginners: Build Your First Python API, a good app to containerize next
- Git for Backend Developers, including
.gitignoreand keeping secrets out of repositories - API Fundamentals, on where secrets should live